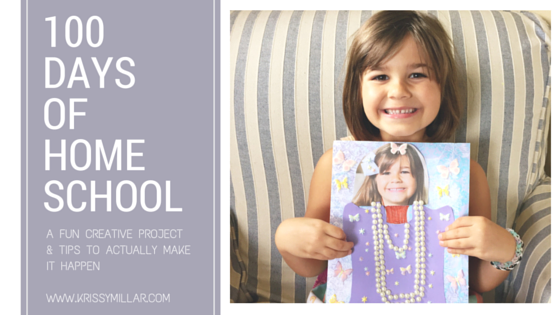
This past week we hit our 100 Days of School mark, and the girls completed their 100 Days project (pictures below). I have wanted to do this as a daily project the past two years but, to be honest, I just haven’t followed through. Two years ago I completely forgot the first few weeks. Last year, when the school year was starting we had the extraordinarily quick move from Georgia to Maui and the first 7 weeks we were without a home and homeschooling out of a plastic crate so the 100 Day Project was nowhere on my radar. This year, this year I was determined to do it. This also meant I had to not make it complicated, AND I had to let it be my children’s project, not mine.
The bonus was that I already had the supplies from the year before. (Woohoo!) Back on the mainland, we had picked up stickers and scrapbook paper at Hobby Lobby. My youngest chose pearl stickers and we made a very fabulous necklace. I snapped a picture the first week of school, printed on my not-so-good-printer at home, and glued it on the paper and decorated from there. (Living up to keeping it uncomplicated and simple, I, the professional photographer, actually printed a photograph on my very basic inkjet printer.) My eldest created a forrest theme with really cute stickers. (And this doesn’t need to be expensive, just be creative. Our budget was $5/student.)
So here are my tips and insights for those of you who might want to incorporate this…
- Use your space well… Do something that can be wall-based if you aren’t moving and have space or do something that can fit in your child’s binder. We used a page protector and slipped in the 8.5 x 11 paper each school day.
- We used stickers and paper because it was easiest for us to do. Both of these are versatile in what you can
create too. There are of course a variety of ideas on Pinterest too. - Allow your children to choose something that they enjoy and be creative with how to represent that for 100. My girly girl loves sparkles and accessories, so a pearl necklace was perfect. My outdoors-lover who could read all day enjoyed creating a forrest bustling with stories to tell.
- Key for me, the teacher: Write it down in your daily planner so you remember to do it.
- This was simple independent work once my kids understood the project.
- Also tally the number of days in your own teacher’s planner. I just kept tract as needed and had a monthly total to make it easy to add up. If my children weren’t sure how many they had put down, adding up their current stickers became a good counting exercise; and truthfully they never complained once about having to count. Simple childhood fun.
- Put it on display once you’ve reached 100 Days. You could also have a little celebration to mark the day too.
- This was fun for all ages. Both my 2nd and 6th grader are already planning on what they will do next year. 🙂
Comment below if you have any other tips or a favorite 100 Days project that you’ve done.


